How to Spice Up Chicken and Vegetables
With just a few tips, the chicken and vegetables can become way more fun to eat. Let’s make blackened chicken and grilled veggies!
How to Grill Vegetables
Let’s start with the veggies. I’m going to use one of my favorite techniques for cooking an easy vegetable side that always makes me feel like I’m eating steak instead of vegetables. The grill!

For those of you who don’t have an outdoor grill, a grill pan or cast-iron skillet is a good substitute, but I highly recommend using the grill if you’ve got it.
As you can see from the photo, I’m using a perforated steel grilling pan, which keeps my veggies from falling into the fire while still allowing them to get that kiss of smoke and fire that makes them taste hearty and delicious.
The broccoli and onions are dressed simply with a teaspoon of olive oil and a pinch of salt and pepper, but the real key here is desiccated garlic; that’s the minced, dehydrated stuff you find in the spice aisle, not garlic powder or fresh garlic and there’s a reason for that.
Normally, I’m always a fan of using fresh garlic, but in this case, we’re cooking over high, direct flame and fresh garlic tends to burn, which leaves it bitter and flavorless.
The dehydrated stuff (such as McCormick Minced Garlic) stands up much better to direct heat and turns into brown, toasty bits with a nice crunchy texture and rewarding pop of flavor every time you bite into one.
It’s little tricks like this that make all the difference when you’re cooking; things that seem arbitrary from a difference, but once you’ve tried them you never go back.
How to Cut an Onion for Grilling
You can see in the photo that the onion has growth lines running from the top to the bottom.
You want to cut in the same direction as those lines (with knife running root to tip) so that the slices will naturally petal out into little half-moon shapes.
So, the sequence of events is:
- cut onion in half longitudinally (cutting through the root)
- peel the onion, lay each half with the flat side on the board, and cut the root off

- slice it medium-thin with knife running root to tip
- Presto! Little half-moons, perfect for grilling

How to Blacken Chicken
The secret to great blackened chicken is not to skimp on the spices.

The salt, of course, we’re going to control, using just a pinch per side for each breast, but the chili powder and paprika, we’re going to be VERY liberal with.
I’m not even going to give a measurement for these spices; simply coat each side of each breast completely in chili powder and paprika.
We’re using smoked paprika here, which is my preferred version for grilling because it adds an extra dimension that pairs perfectly with the smokiness of grilled meat.
And look what a nice crust it forms on the grill:

Again, if you don’t have a grill you can use a grill pan or cast iron, but I’m a big fan of direct flame for this. It takes about 3 minutes per side over high flame, or if you’re using a thermometer it should read 161 degrees at the thickest point. You might be confused by 161 if you’ve heard 165 degrees for poultry elsewhere. The thing is, while 165 is the correct number, meat tends to continue cooking after you take it off the heat, as the heat from the outside continues to penetrate the breast. There’s nothing worse in my book than overcooked chicken breast. With no fat to protect it, the protein tightens up, squeezing all the juices out and leaving you with something that resembles protein powder instead of food. Then you end up wanting to slather it in sugary BBQ sauce to make up the difference instead of enjoying the natural juiciness of properly cooked chicken.
How to Check if Meat Is Done
If you don’t have a thermometer, do what chefs do and use the “poke test.”
The poke test doesn’t mean poking holes in your meat so all the juices run out. It means lightly poking the meat with your index finger to judge its firmness.
As proteins cook, they tighten, becoming firmer as they pass through the various stages of doneness.
The best way to become familiar with those stages is to use your palm as a guide. If you poke the fleshy part of your palm, just below your thumb like this:

It will have about the same firmness as rare meat. If you touch your index finger and thumb together, your palm begins to tighten, giving you medium rare:

Thumb touching middle finger gives you medium:

Thumb to ring gives you medium well:

And finally, thumb to pinky leaves your palm the firmness of well-done meat:

For chicken breast, I always remove it from the heat at medium well (that’s thumb touching ring finger) then let it rest up to just above for juicy perfection.
Speaking of resting, you always want to let grilled meats rest for at least five minutes before slicing into them.
This allows the heat to penetrate to the center and gives the proteins a chance to loosen up.
Otherwise, the moment you breach the meat with your knife, those contracted fibers will squeeze the juices out and onto your cutting board, leaving you with dry chicken, steak, or whatever it is you happen to be cooking.
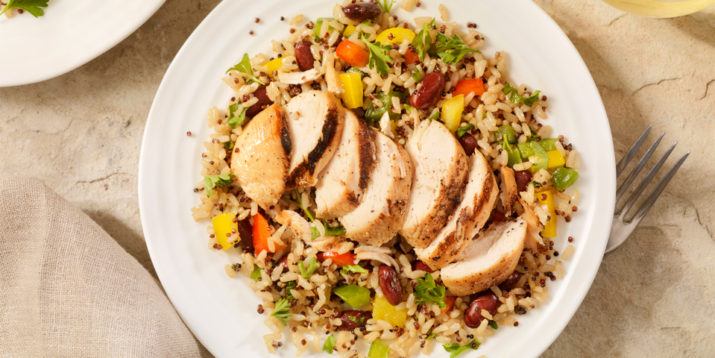
I like to slice chicken breasts thin at an angle.

It’s a nice presentation and it gives you just enough crust per slice. You can see from the picture why all that spice we rubbed on before cooking doesn’t actually overwhelm the meat.
Once sliced, it leaves you with a flavorful, charred ring wrapped around a juicy, tender center. Yum!
To tie together the chicken and veggies, I’d cook some quinoa in low-sodium chicken stock instead of water for extra flavor. Enjoy!
