Expert Tips for Perfectly Grilled Chicken
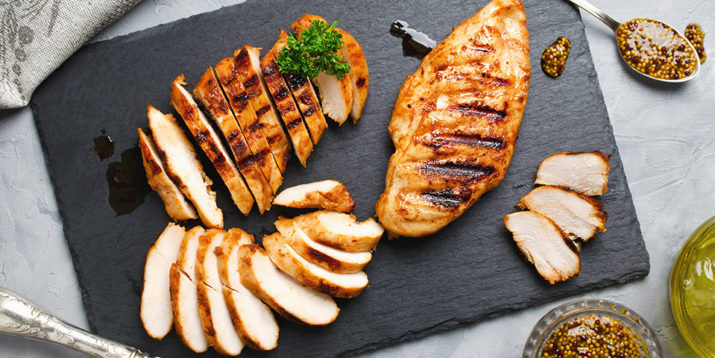
Perfectly grilled chicken — crusty on the outside, and moist and juicy on the inside — is a great addition to any picnic, barbecue, or summertime meal plan.
It’s also an easy way to boost your protein intake.
And using grilled chicken in your meal prep can help you save time in the kitchen — just grill a batch on Sunday and use it throughout the week in a wide variety of delicious chicken recipes, including soups, salads, pastas, pizzas.
So how long should you cook chicken on the grill — and how can you keep it from drying out? Here’s what you need to know.
How to Grill Chicken Breast

Follow these simple steps to get evenly-cooked, juicy chicken with plenty of flavor.
Prep it
An hour before grilling, take your chicken out of the fridge and allow it to come up to room temperature, which helps it cook more evenly, says Holly McKee-Clark, former culinary specialist for BODi.
Even it out
Chicken breasts typically have an irregular shape, so as you wait for the thicker side to cook, the thinner side becomes dry and rubbery.
“To prevent undercooked or overcooked chicken, you want to create an even surface — flatten out the chicken piece so that one side is not thicker than the other,” says Brittany Crump, M.P.H., R.D. at Savor Nutrition.
Put your chicken breast into a zip-top bag with a little oil, seal it, and give it a few good whacks with a meat mallet or other blunt instrument.
Get your grill ready
“Always brush your grill clean before grilling,” McKee-Clark says.
Before lighting the grill, lightly rub or spray the grates with a cooking oil that has a high smoke point.
Add chicken to a hot grill
To keep the chicken juicy, cook it quickly over a hot grill that has been preheated for at least 10 minutes.
“Don’t put your food on the grill until it’s super-hot, and don’t move it once placed, until it’s time to flip,” McKee-Clark says.
If possible, check that the grill’s surface reaches 425 to 450° F before cooking.
Cook thoroughly
Now, how long to grill chicken breast? “Five minutes on each side should be sufficient,” McKee-Clark says.
Use food scissors to check for pinkness. Better yet, a meat thermometer is a surefire way to check that your chicken is done throughout.
“For safety reasons, chicken must be cooked to an internal temperature of 165° F,” Crump says.
How to Grill Chicken Thighs

If you know how to grill chicken breast, then you know how to grill chicken thighs! For the most part, you can simply follow the steps above.
However, there are a few additional things to keep in mind when cooking chicken thighs:
- Choose boneless, skinless thighs. Bone-in chicken thighs come in various shapes and sizes, making them harder to cook evenly. (If you’ve accidentally hit the raw center on a piece of barbecued chicken thigh, you know what we’re talking about!)
- Boneless, skinless thighs will also absorb seasoning better and cook and more evenly. And because they tend to be more uniform in thickness than chicken breast, you may not need to flatten them.
- If you’re wondering how long to cook chicken thighs, the exact answer varies depending on the thickness. As with chicken breast, start by grilling for 5 minutes on each side, and be sure to use a meat thermometer to make sure the internal temperature reaches 165° F.
Tips for Perfectly Grilled Chicken

Ready to step up your grilled chicken game?
These tips can help you get juicy, expertly cooked chicken that’s full of flavor.
1. Brine before grilling
“Brining chicken before grilling is the best way to ensure it doesn’t dry out,” McKee-Clark says.
Brining is a method of letting meat soak in salty water to add moisture. Follow McKee-Clark’s steps for making an easy, flavorful brine:
- Make the brine base: Add equal parts water and salt to a large, resealable plastic bag.
- Bring in more flavors: Add citrus (lemon, orange, lime), herbs (cilantro, parsley), and vinegar (balsamic, red wine). Shake the bag to mix.
- Seal in chicken pieces and wait: Let it marinate for at least two hours, or up to overnight. A longer soak helps the chicken absorb more flavor and moisture.
A good rule of thumb is to brine chicken for 2 to 3 hours for every inch of thickness.
If you need to save time, keep in mind that a thinly butterflied (or pounded) piece of chicken might only take 30 minutes to brine. For food safety reasons, always brine chicken in the fridge.
2. Add flavor
After brining, season chicken as you normally would with a marinade or dry rub.
“Be mindful not to add too much salt to chicken after brining, since it will have already absorbed some sodium from the brining solution,” Crump says.
- Marinades — usually made with oil and acid — will be better at making the chicken tender. Plan for at least a 30-minute soak so your meat can absorb the flavor of the marinade.
- Dry rubs — made from a blend of herbs and spices — help you get a good sear and crust on your grilled chicken. To avoid drying out your chicken, consider adding a glaze to seal in moisture. You can easily make a glaze by mixing oil with a bit of honey or syrup. Grill your chicken bare first, to get a good crisp on all sides, then brush on your glaze in the last few minutes of cooking, several times on all sides.
3. Top it off
Grilled chicken is good on its own, but you can add more flavor by topping it with a healthy sauce.
Try one of these:
- Healthy Barbecue Sauce
- Chipotle Ketchup
- Healthier Ranch Dressing
- Homemade Thousand Island Dressing
- Avocado Dressing
- Honey Mustard Dressing
Want more expert nutrition tips and delicious healthy recipes? Head over to BODNutrition.com to learn how BODi nutrition programs and products can help you lead a healthier lifestyle.